Monday, September 13, 2010

Chickens! ...and a workshop

I've been working on two big projects over the last 5 days or so. The first is a chicken coop. We've decided that we want to try raising chickens, mostly for the eggs.

We decided to put the coop next to the barn.


The overgrown area to the left of the barn is the spot.

I completely cleared out the area and then built the coop. I dont have any during pictues but it's basically built out of pressure-treated 2x4's for the framing, chicken wire for the sides, and tin for half of the roof and plastic fencing for the other half.


The area beyond the coop and to the left of the barn will be closed in for another coop soon.

The chickens we are concentrating on are Black Copper Marans, they have very dark, reddish brown eggs that are supposed to be highly prized for their excellent taste. Here is our Marens rooster.


We also have some Dominickers, Cochins, and a few Silkies.

The other project I began working on is a workshop. I really need a place to work and to put all my tools.

The shed behind the kitchen is nice but at 11x11 it's too small.


What I decided to do it tear down the lean-to on the back side of it and add on to the main structure. I will be adding on another 11'. So it will be 22x11. The 11 is a bit smaller that I'd like but I think it will be ok.


The lean-to was so rotted that it only took about 15 minutes to completely tear down by hand. It took longer to haul away the debris.


I pulled up the old blocks to reuse for the new foundation. I had to use a few new blocks.


Next, I pulled the bottom piece of tin off the wall to install the ledger board.


Then I setup the rest of the framing for the joists.


That was as far as I got last night. I was three joists short anyways. I will get them on the way home from work today and also the flooring, I will be using 2x12's just like in the original portion of the shed.

Tuesday, August 31, 2010

garden

We've been working on a vegetable garden in our back yard. We're going to plant late season crops like broccoli, Collard and Mustard Greens, lettuce, and a few other things. We bought most of them as plants, the rest I started from seed a few weeks back.

I tilled up a small area in the back yard next to the barn that's about 35'x20'.


Then I put up a chicken wire fence.


This is our two Danes checking out my work.


Once I rake it out and hoe the rows I will plant everything.

Friday, August 27, 2010

Work continues on the columns

I am slowly getting the columns done. So far I have 4 of the 8 1/2 columns that I took down re-installed.

I'm making one change to the columns as I put them back up. The cap where the top and bottom parts of the colum meet is a weak spot. The cap is nailed to the bottom part of the column then the top part is toe-nailed to the cap.


I know it sat that way for over 100 years without a problem but I feel better adding a little structural staility to this area.

What I'm doing is taking a small 4x4 piece and screwing it to the base with 3" deck screws. I then screw a 3/4" piece of flooring to the 4x4. This makes 4 1/4", the size of the opening in the top part of the column.


I then take the top part of the column and slide it over the 4x4 and secure it into place with more 3" deck screws. This also has the added benefit of repairing the caps, most of which are split in half as you can see from the picture above.


I got a little bit ahead of myself and started installing them before primering. Hopefully I can finish all the columns by this weekend. That may be a bit of a challenge though, the double column by the steps has rot at the base, and the capital is rotted on the single column across from it.

Monday, August 23, 2010

Porch Columns

I decided to get back to work on the front porch columns. They have been sitting outside in the elements since I took them down way back in March.

I didn't get many pictures of my progress. Here is a picture of one of the columns during scraping.


This is the top half of the column. I am completely removing all the paint from the columns so it's a very slow and tedious process. I completely stripped, primered and installed one column and stripped half of another column before it got dark.

Here is a pic of the column installed, it's not a great shot since it was dark before I remembered to take the picture:

Thursday, August 19, 2010

Side Hall Wainscoting

Last night I finished the side hall wainscoting. In an earlier post I had shown how someone used black tar to stick paneling to the wall. This tar was all over the wainscoting. Here is a picture from last week, you can see the tar covering the wainscoting:


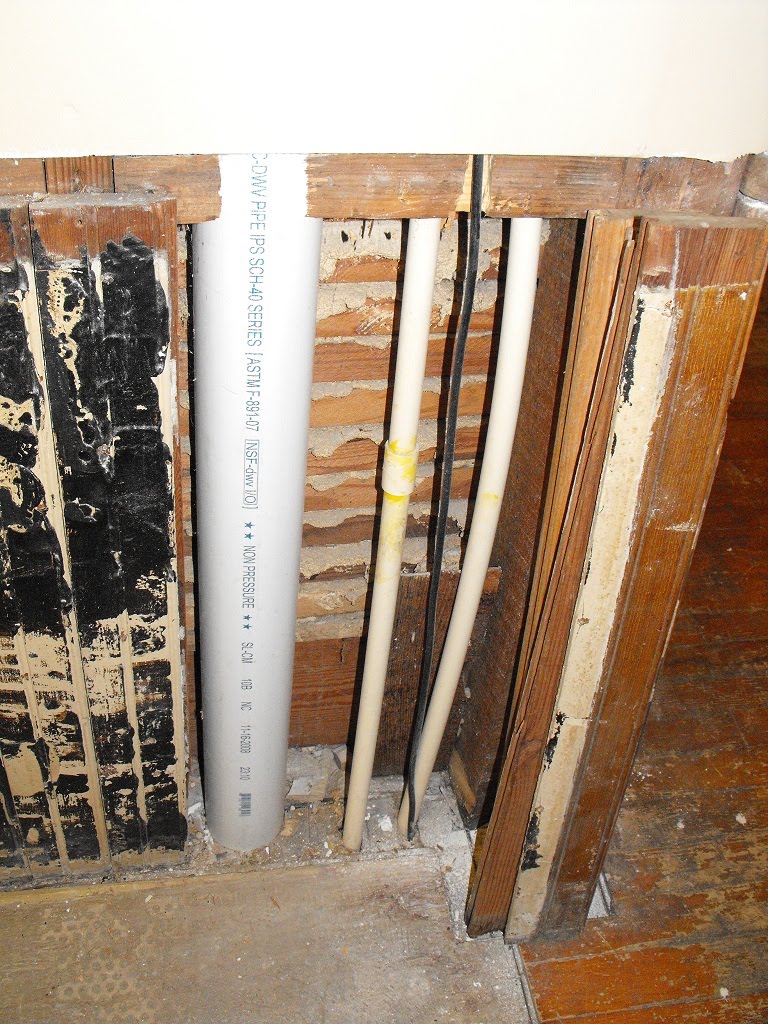
You can also see the missing boards to the right. These were removed to run the plumbing, electrical, cable, and the vacuum line.

The 3" drain pipe sticks out slightly from the wall so I couldn't just slap a board over it.


I had to remove some material from the back of the piece of beadboard for it to sit flush. I did this with a table saw.


Here are the boards test fitted into place:


The last board will need to be ripped to fit. I am not going to install the 3 boards that cover the vacuum line yet because I still need to tie it in under the house so I want to leave it open for easy access.

With all that done I got to work removing the tar. I started by using a heat gun but the tar just got very gooey and was making a worse mess. The best method I found for removing it was to use a very sharp scraper. I had to re-sharpen the scraper every 5 minutes or so but it worked pretty good.


Notice the outline on the wall? Looks like there was a large radiator here before it was converted to a bathroom.

Once all the tar was removed I sanded the boards smooth and then primered and painted them.


Next I need to get the chair rail and picture rail made. I also need to buy the oak T&G flooring, I am going to pull up the existing flooring all the way up to the edge of the main hall and then lay the new flooring down.. Before I do that though I need to fix the sub-floor just to the left of the bathroom door. The toilet sat here so it's in pretty bad shape.

Thursday, August 12, 2010

Hall Corner

I've finished the outside corner where the two halls join.

I sanded and put the final coat of mud up on Tuesday.


Then last night I did the final sanding and  painted it.


Next up I need to finish the side hall. As you can see from the pictures above I have a lot of work to do on the beadboard. The side hall was turned into a bathroom in 1922, at some point after that the beadboard was covered up with paneling that was glued to it with some kind of black tar. It's this tar that I need to remove before I can paint it.

I also need to have some picture rail and chair rail replicated for this area as the original is long gone, it was most likely removed when the paneling was put up. The gap between the sheetrock and the beadboard is for the chair rail. I also need to find some crown for the ceiling.

Tuesday, August 10, 2010

Main Hall

I worked on the hallways over the weekend. I finished the main hall and almost finished the side hall.

After the final coat and sanding of mud I primered everything.

The corner between the two hallways is coming along. 


It needs a sanding, one more coat of mud then a final sanding.

I went ahead and painted the main hall to get it done and out of the way.


I'm hoping to finish up the side hall in the next day or two.

Monday, August 2, 2010

Side Hall

This weekend I worked on the side hall. Here is a pic of how the hall looked last year:


I knew I wasn't going to finish it on my own so I hired on someone to help me. We took down all the plaster and lathe, then put up a few 2x4 studs in the corners, then put up sheetrock, then tape and mud.

Here it is after this weekend:


The small gap between the sheetrock and the wainscotting is for the chair rail that I need to have cut. I'll sand today and put up one more coat of mud. Then I can do the final sanding, primer, then paint.

Saturday, July 31, 2010

Parlor

The Parlor is the next room I've started on. All of the wallpaper and trim is stained yellow from what appears to be years of cigarette or cigar smoke. A few weeks ago I started scrubbing the wallpaper and it looks like I will be able to get it clean enough to save.


I'm using bleach and a scrub pad. I still have about half the room to go.

I went ahead and prepped and painted all the trim over the last few days. I dont have a good before picture of the ceiling but here it is after I scrapped all the loose paint off:


And here it is after painting:


All the trim is now complete. I still need to scrape the paint off the windows and a few areas need some caulking.

I pulled the fireplace mantle off the wall because I intend to strip it down and refinish it. In pulling it off I've discovered that the mantle is oak. The mantle is just leaning on the wall for now:


I also found a piece of original hearth and surround tile:


The red brick looking tile was installed sometime in the 40's when the oak floors were done. The floor was laid over the original pine floor so the brick tiles were just put over the original green glazed subway tiles to bring the hearth up to the same level as the oak floor. I am going to tear up the red tile then carefully remove the original tile then lay down a new mud bed then reinstall the original tile. I need to find some salvaged green tile for the surround though since that was removed.

Monday, July 26, 2010

Foyer and Side Hall

Wow, almost 2 months without a post! Things have been hectic around here lately. I have done some work on the house though. Two of the projects I have been working on are the Foyer and the Side Hall.

I've been dying to get the foyer done because it's the first thing everyone see's when entering the house. Here is a picture of how it looked before.


What you can not really see in this picture is the condition of the paint. The white trim is scratched, chipped, and stained and the red is just way too dark for this room.

I spent most of the last two days repainting all of the trim and the walls. Here are a few pictures of what it looks like now.


In the third picture you may have noticed that the front door is not repainted. I am holding off on doing that for now because I am debating on stripping and shellacking it.

You cant see it in the pictures but I removed all the carpeting from the stairs, they were carpeted above the first landing with a nasty old green carpet. The treads are in great shape except for a few paint stains. That shouldn't be too hard to remove.


The other project I have been working on is the side hall.


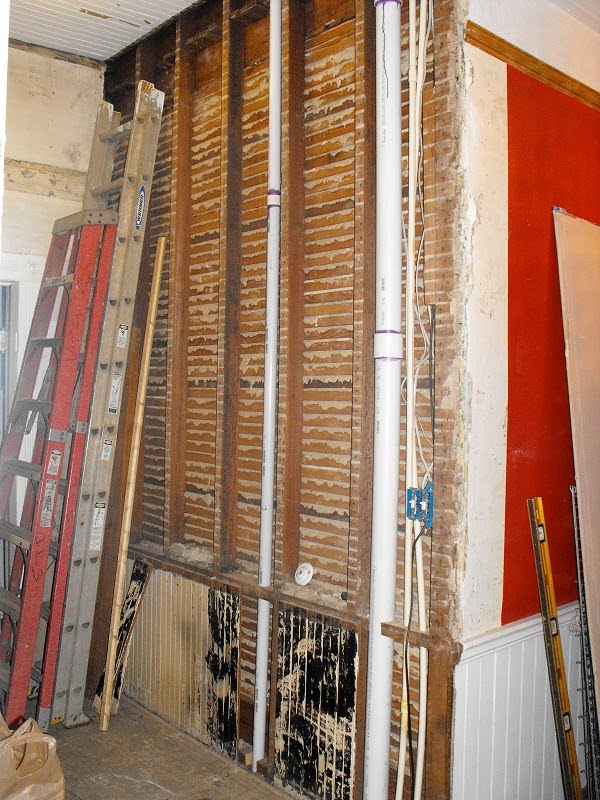
 I ran a 2" PVC vacuum line in the wall for the whole-house vacuum I intend to install in the future. This runs up into the laundry room in the attic.


I also ran some string in the wall for anything I may need to run in the future. One thing I need to run is an Ethernet cable for the video surveillance system I will be installing in the near future.

With that done I started putting up the sheetrock.


The side hall is in the back part of the house where the ceilings are 11', the main hall is 10'. The plumbing from the upstairs bathroom runs down this wall but it comes out from the bathroom floor into the side hall up near the ceiling. I had intended on boxing this in but was not looking forward to it.

Instead we decided to just paint the PVC pipe black to make it look like old cast iron pipe and leave it exposed.


I still need to put up sheetrock behind it but I think it will look fine.

Wednesday, June 2, 2010

Back to painting the house

Things have been hectic here with the new baby but I have done some work. Most of it has been in the yard. I cleared almost the entire back yard of overgrowth and removed a bunch of stumps including the monster in the front yard. I will post pics of that later.

Yesterday I got back to work on painting the exterior.


I will post more pics as the work progresses.

Monday, May 17, 2010

Our new baby

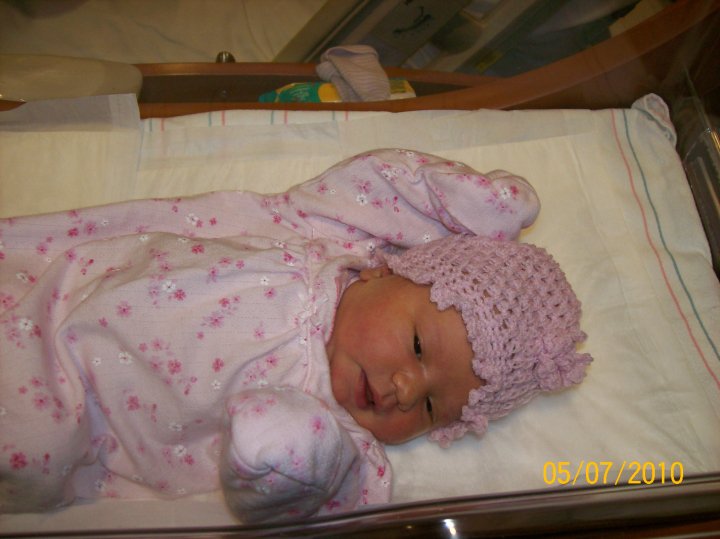
Sorry for the long delay in posting. On May 6th we welcomed our new baby girl, Payton Victoria, into the world.


The only work I've done on the house is to the yard. I've been busy clearing it out and planting some dogwoods and Crape Myrtles.

Hopefully I will be able to get back to work on the house soon...