Showing posts with label antique furniture. Show all posts

Thursday, July 12, 2012

Upstairs Hall

We've been doing a lot of work on the house lately. One of the projects has been the upstairs hall.

This is what it looked like when we bought the house:


And here are some current pictures:


For the past two weeks I've been running electrical to new lights and outlets, putting up crown and trim, caulking the cracks in the walls and ceilings, and painting.

Here are pictures of two of the upstairs bedrooms:


The first is our daughters and the second is ours. I have not cut in around the trim in our room yet.

I dont have any in progress shots because I was too busy to get any.

I'm going to throw in a picture taken from the Parlor looking into the Foyer:


Sunday, January 1, 2012

Main Bathroom Update

The main bathroom is another project that I have been working on. Last week I finished cutting in the primer on the walls, then I scraped all the trim.


One of the neat things I found here was the old exterior trim color, it's the brown/olive looking color on the door casing. This room used to be a side porch. I know this was an exterior color because when they closed the porch in and hung the interior door they just slapped the hinges up on the casing, you can see where they were on the casing on the right. That color was directly underneath.

Once the scraping was done I primered and painted all the trim, then painted the walls.


Sorry for the pics, it's very hard to get decent shots in this room.

Left to do still is install 1/4 round and baseboards, caulk, and paint the ceiling.

Saturday, December 31, 2011

Finishing up the Side Hall

I've spent the last few weeks working on the house. The side hall was the first project I worked on.

Back in October of last year I laid the new oak flooring in the side hall but I never finished the last row.


It only took about an hour to install the final row of flooring, but last year I spent two sixteen hour days on it and by the time I got to the last row, which I had to rip down to the right size, I was just too tired to finish.


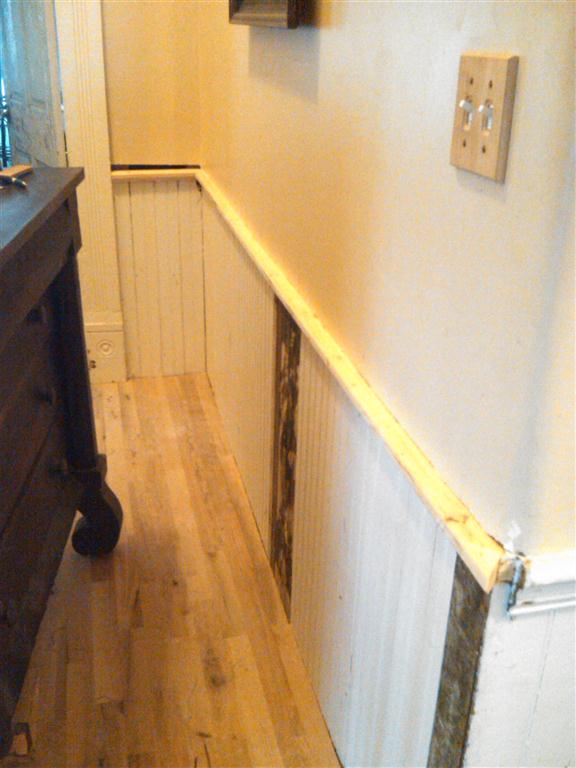
With the floor finally finished I turned to the chair rail. I was originally going to have some made for me but once I looked closely at the profile I realized that I had a router bit that could do it in two passes.


It's an almost perfect match to the original. Next I finished the sheetrock above the chair rail.


The trim that makes the bottom part of the chair rail will have to be made, I cant do it and there is nothing even close at the store.


Here are a few pics of the side hall now.


Left to do still is the trim for the bottom of the chair rail, picture rail, and crown. Oh, and replicate a leg for the Empire dresser...

Monday, November 28, 2011

Dining Room

I took Thanksgiving week off to finish up some projects around the house.

The Dining Room was what I really wanted to get done the most. It has been half done since I moved the wall to make more room in the kitchen almost three years ago.

Here is what it looked like at the beginning of last week.


First I moved everything but the furniture out of the room, then I moved the furniture to the center of the room.

Next I scrapped the peeling walls above the picture rail. Once it was all scraped I mudded above the picture rail completely around the room.

With that done I worked on the door casings for the exterior door and the door that leads to the hallway.

The casings on the door that lead to the hallway had separated and were loose. I removed them and reinstalled them properly.


Next I worked on the door casings for the exterior door. You may remember in previous posts that the original doorway was closed off in the past and I reverted it back to a doorway.

First I finished mudding the area.


Next I began working on the casing and rosettes. the only two rosettes I had left were both split in half. I used my doweling jig and glued them back together with dowels.


Once they were dry I installed them above the door along with the casing.


Next I installed the picture rail on the wall that I rebuilt.


With that done I was ready for paint. I went around the room and glued down any loose wallpaper.

I really hated to paint over the wallpaper but there were just too many places where the paper was in too bad a shape.

First I primered and painted the trim.


Then I primered and painted the walls. It turned out that there was something wrong with the paint I chose, it was way lighter than the paint sample at the store. I didn't have a choice though and had to use it. I painted on Thanksgiving morning so we had to hurry and get the furniture back together for Thanksgiving dinner so I didnt get any pictures until after the dinner.


I also had to do some last minute electrical to get an outlet in for the china cabinet light.

I still have a lot of wainscoting to caulk and paint, I need to have some casing replicated for the door to the kitchen, and the ceiling needs to be primered and painted.

Wednesday, April 13, 2011

Atwater Kent Model 10C

Sorry, this is not a post on the house progress. I am pretty much done with my hiatus though and will be getting back to work very soon.

This post is about an old radio that I just bought. It is so cool that I just had to share it here.

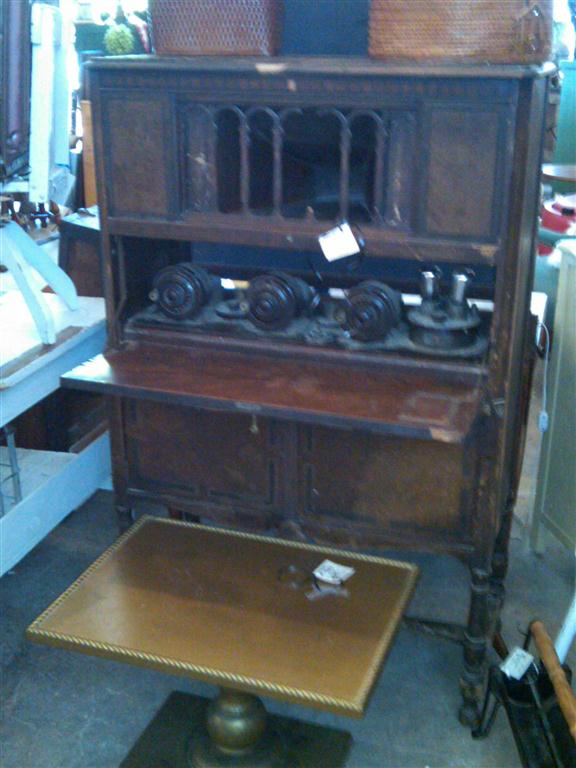
Here is how I found it at an antique mall:


I'd never seen anything like it and was immediately interested. It turns out that they are quite rare.

It's an Atwater Kent Model 10C radio in a Pooley cabinet from 1924. This was very early in the history of the radio era, the first radio station started broadcasting in 1920.

The radio is tuned by all three dials, the knob in between the first and second stage controls the volume. The knob on the right below the tubes also controls the volume somewhat. Not sure what the knob on the first RF coil on the left controls.
 
After bringing it home I started cleaning it.

Here is a picture of the radio removed from the cabinet:


As you can see it's quite dirty. The radio by itself is called a breadboard by the way.

Here is the radio after a bit of cleaning:


The cabinet needs a lot of work, I'm going to have to remove and replace a lot of veneer and refinish the entire cabinet.

I cleaned the radio with a damp cloth but it still needs a lot more cleaning and I'd really like to get it working. It's missing 3 vacuum tubes which aren't cheap. I've found a few sets on E-bay but they run about $250 for the whole set of 5.

I'll take more pictures once I have restored it.